
Introduction
Ethical hacking is the most important and practical aspect of learning cyber security. I believe that anyone who wants to ace in cyber security must first clear his basic concepts with ethical hacking practical. Ethical hacking cannot be learned or practiced without doing practical in a controlled environment. And the most basic challenge for the practical is preparing a lab. One option is to join an institute/university and use their lab setup which is built by investing thousands of dollars. But even then, the setup would be shared with many students and the chances are you will not be able to modify the configurations according to your own learning requirement.
So, it would be great to have your own penetration testing lab at your home which you can destroy or reconfigure anytime you wish. Setting up lab at home may require some investment with few computers and routers. However, in this article I will describe to setup a basic penetration testing lab with zero investment if you have a good configuration laptop.
Resources needed
- A good configuration laptop/desktop is the only requirement to setup this lab and start hacking.
- Virtualization should be enabled in your BIOS. If your system is not too old, chances are you must be already having this feature and should have been already in enabled state. Boot your system and find vt-d then enable it, if it is not already enabled.
- Around 50 GB of free disk space is required to install virtual machines. 50 GB is for two VMs but chances are we may require 3-4 VMs installed sometime. In that case more space might be needed.
- Minimum 8 GB RAM is required on the system but 16 GB is recommended otherwise your system will become very slow.
- Operation system on the system – virtualization support is there in almost all OS today. No specific requirement here. Any recent version of Linux/Mac/Windows would be okay.
- Virtualization software – Virtual Box/VM Ware/Hyper -V. If you are planning to work with Hyper-V, it is supported only with Windows 10.
- Some basic networking knowledge will help you to setup all the stuff very fast. However, the configurations described in this article are very easy to grasp. The networking knowledge might be helpful in the situations when you are stuck with some error which is specific to your system.
Step 1: Install Virtual Box
You can install your choice of virtualization software. Virtual box, VM Ware or Hyper-V. However, I would recommend for Virtualbox. It’s free, open source and safe. You can find more detail and installation files at https://www.virtualbox.org/.
Installation is simple, just download the correct package for your OS and run it. Follow the instruction on the setup and it should be smooth. After installation is done, run Virtual Box from start menu and a window similar to below will appear.
Step 2: Install Target VM
Now the main work starts. First, we shall setup a target virtual machine i.e. the machine which we want to hack. You can install any operating system for this. For example, if your team has developed an windows application which you have to test for security. You shall install windows OS and then install the application on it.
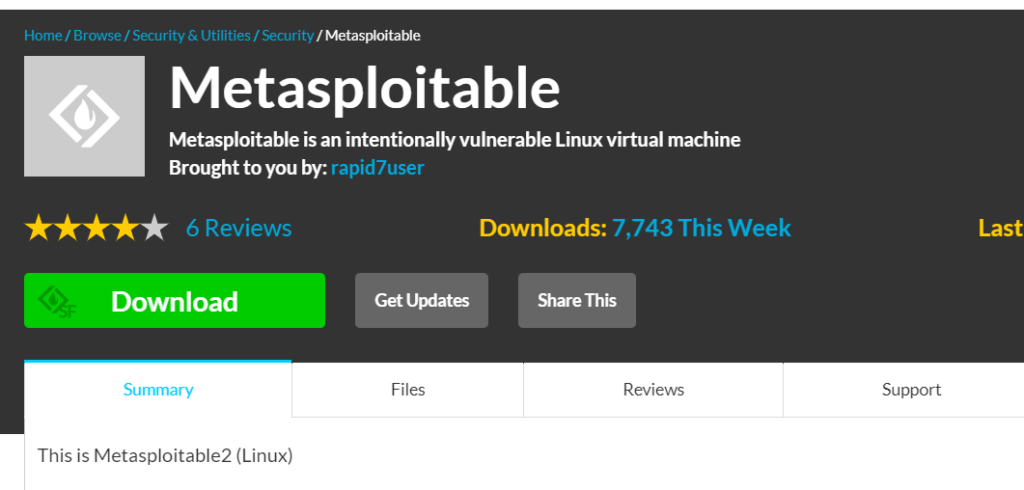
However, when we are learning ethical hacking, we need a target machine which has some intentional vulnerabilities. Metasploitable, is an intentionally vulnerable Ubuntu Linux virtual machine that is designed only for testing common vulnerabilities. This virtual machine is compatible with VMWare, VirtualBox, and other common virtualization platforms.
Download Metasploitable 2 image from https://sourceforge.net/projects/metasploitable/ and unzip it.
Next create a new VM in virtual box and select the option “Use an existing virtual hard disk file”. Give the path of unzipped Metasplotable file path. Click on create.
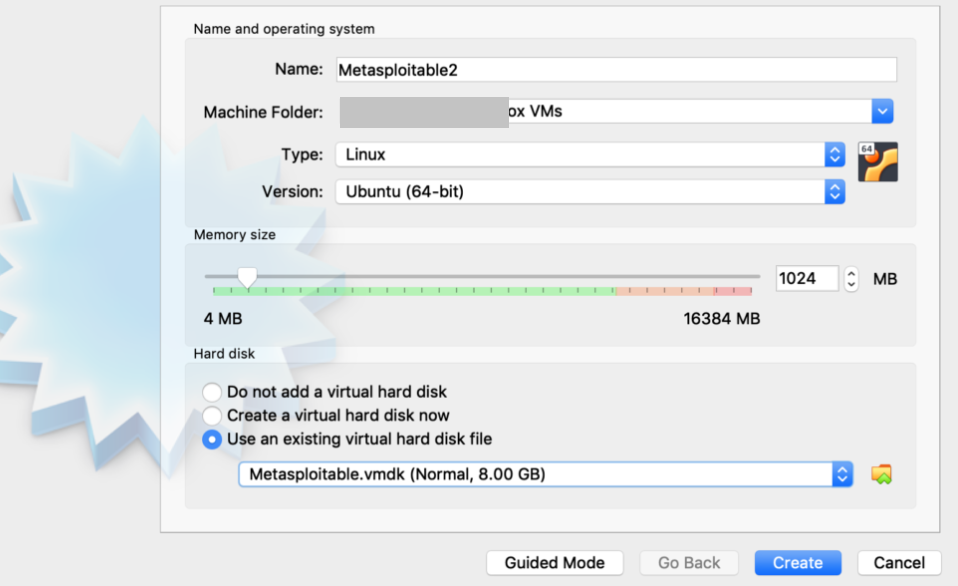
That is, it. Your target machine should be ready. Boot the VM from Virtual box and login using the credential msfadmin:msfadmin.

More info about Metasploitable can be found at https://docs.rapid7.com/metasploit/metasploitable-2/
There are many other VMs with vulnerable applications you can give a try, such as:
You can also consider testing with some vulnerable VMs from sources like VulnHub.
Step 3: Install Kali VM
In the next step, we shall install Kali Linux, it is the most widely used Linux distro for ethical hacking and penetration testing. Kali Linux is developed by Offensive Security and it was earlier known as BackTrack.
There are few other OS which are built especially for the security testing. Here is a short list if you want to give them a try –
BackBox – BackBox is Ubuntu-based distro developed for the purposes of penetration testing and security assessment.
Parrot Security OS – Parrot Security OS is based on Debian and uses MATE as its desktop environment. Many pen testing tools are available in it.
BlackArch -BlackArch is a penetration testing and security research distro built on top of Arch Linux.
Bugtraq – Bugtraq is a Linux distro with a huge range of penetration, forensic and laboratory tools.
For this blog, I will continue with Kali Linux. There are pre-built Kali images available to download and you can get it from https://www.offensive-security.com/kali-linux-vm-vmware-virtualbox-image-download/. Images are available for all the three software Virtual Box/VM Ware/Hyper -V. To continue setup with Virtualbox, download its image from the link.
The downloaded file is a Virtualbox appliance file. After the download completes, open VirtualBox and select File > Import Appliance…
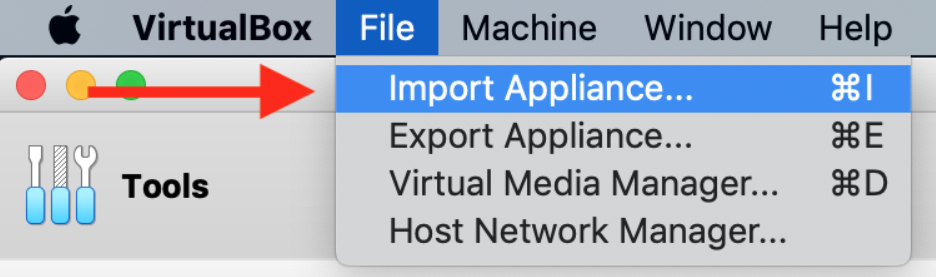
Once successfully imported, your Kali VM is ready for hacking.

Step 4: Network Configuration
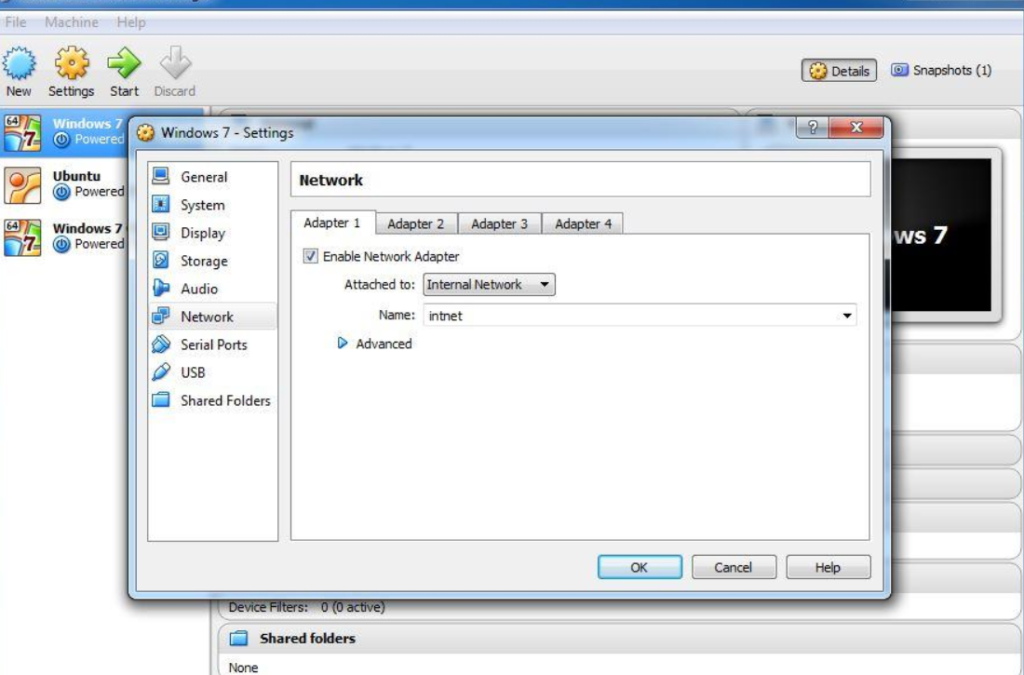
Now when we have installed both target VM and Kali VM for attack, the most important thing left is to do is network configuration. We must be extra cautious with these VMs and should never expose them to the internet. In this blog, we will use “Internal” network configuration in Virtualbox which is the most secure option. Since we don’t need to access the host machine from VM and also no need to access the Internet for doing internal testing, “Internal” network is the best option. As described in the below table, with internal network, we can access only other VMs which are configured in the internal network.
Overview of Networking Modes. Source : https://www.virtualbox.org/manual/ch06.html
| Mode | VM→Host | VM←Host | VM1↔VM2 | VM→Net/LAN | VM←Net/LAN |
| Host-only | + | + | + | – | – |
| Internal | – | – | + | – | – |
| Bridged | + | + | + | + | + |
| NAT | + | Port forward | – | + | Port forward |
| NATservice | + | Port forward | + | + | Port forward |
Select your metasploitable VM in the Virtualbox window and click on settings. Go to Network and select “internal network” in the Adapter 1 tab. Click OK. Repeat the same for the Kali VM.
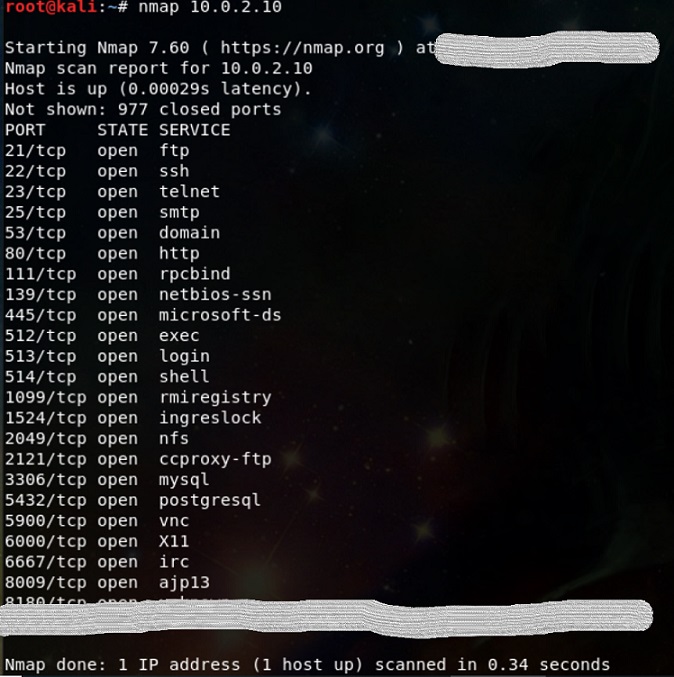
Now when you will boot your VMs, you should be able to ping metasploitable VM’s IP from Kali VM. That is all needed to start hacking.
Conclusion
A penetration lab at home is helpful for an experienced professional pen tester but for a beginner it is an absolute necessity. For ethical hacking, it is essential that we follow ethics all the time while testing anything. Due to this and also to maintain the security, testing shall be done in an isolated environment like a pen testing lab we created.
As we discussed in this article, making a pen testing lab at home is very easy with zero investment, also always start small and build up over time. The simplest lab can be created using a couple of virtual machine images available as a free download and complexity can be added as it becomes necessary. I hope this article was useful for those of you who are thinking to create a lab at home to sharpen your security skills.
Related Posts


